I've been enjoying my custom digital pinball machine for over 7 years. If you followed my original pinball build log you'll know that this is what I built:
I definitly cut some corners. While the machine is fun, I think it's time to upgrade my pinball experience. After all, I play that pinball machine more than all my other arcade machines put together!
Here are my goals:
The TV I used for the playfield has very bad burn-in
and, it doesn't come on when the power switch is pressed (like a computer monitor would)
I want a better "coin door" this time
And, I want a real lockdown bar (instead of the one I made out of wood)
If I'm getting a real lockdown bar, I want real side rails as well!
I want to include a DMD (third screen)
I want an upgraded backglass area that doesn't look so squat
I hate the way some pinball tables are cut off at the bottom (I want a bigger screen!)
While the NUC was... OK... I want to upgrade my computer/video card
Since I'm doing all this, I might as well upgrade to the latest software versions
Prep Work
Ever since my house burned down, I've been replacing tools and setting up the garage. Knowing I would need one, I just went out and got a drill press and set it up:
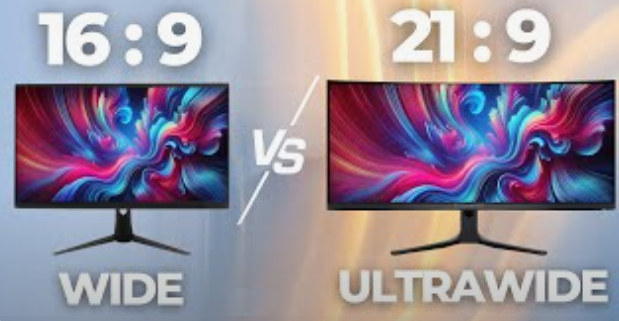
I ordered a real lockdown bar and receiver assembly (from a real pinball machine) and a few other pieces as well. While waiting for that to arrive, I ordered a 21:9 computer monitor (flat):
I settled on the following monitor: msi MAG 401QR, 40" Gaming Monitor, 3440 x 1440 (UWQHD), IPS, 155Hz.
Since it is a computer monitor, it will turn itself on when the computer starts. That's one thing I always hated about my original build--I always had to turn the playfield screen on by hand.
Also, At 40" diag, this is the largest flat computer monitor I could find. The size is 18" x 37" which I think is closer to an actual pinball machine. The width is smaller than the lockdown bar and it is taller than my previous screen, so I will be able to see the top ramps and whole instruction cards at the bottom.
When the monitor arrived, I set it up next to my existing pinball machine and hooked it up just to see what the table layout would be:
This is AMAZING! I'm getting excited now! Time to make this a reality!
I had wanted to redesign my cabinet to make it more like a real pinball machine. I worked on designs and just ended up making the same design as my original cabinet. Well, it is a couple of inches shorter than before, but that's it.
Once the lockdown bar arrived, I know EXACTLY how wide my machine should be. So, here's my basic design:
Once I finalized that, I started the woodworking.
Woodworking
I went to the lumber yard and got a 4x8' sheet of 3/4" plywood (sanded on both sides, cut down the middle so it would fit in the car), some 2x4s, some 8" shelving, some 10" shelving, and a scrap of 4x4).
I love the smell of freshly cut lumber!
While I was there, I looked for a T-molding slot cutter (router bit). No luck. So, I ordered one on Amazon.
(Just another thing I lost in the fire and I'd forgotten to replace.)
Starting out, I cutout a piece of plywood for the back and drilled a hole for the power cord.
Then, I cutout a piece for the front and started designing where the buttons/door/plunger would go.
Next, I drilled a hole for the start button (same as before) and the menu button (much different than before).
This time, I used a smaller button for the menu and I counter sunk it so that you won't accidentally press it while playing the machine.
Here's the basic layout of the front panel:
Everything is just sitting together on the bench. But, this is how it will look once finished.
I no longer have separate "coin in" buttons. The coin return buttons on the coin door will active the "coin in" circuit. This is a much cleaner look.
Next, I'll cut out the sides and bottom pieces.
OK, the sides are cut, I also cut some of the 8" shelving (2 pieces) to start the backglass portion.
I screwed the front onto the sides and I screwed the back onto the sides. Now, I'm ready to measure the bottom (which it is sitting on) and cut it out.
Next, I cut out the bottom piece and sprayed where the holes will go for the subwoofer and the air intake fan.
I place a fan finger guard over the hole to prevent my grandkids from poking their fingers into the fan or the subwoofer:
Next, I used paper to mark where the screws should be placed to hold the power strip in place:
I did a mockup of the access hole for the power strip:
This time, the power strip is much closer to the front of the machine, so I won't have to go digging between machines to find the power switch.
Finally, I designed two braces to hold the screen; one near the front (just behind the flipper buttons) and one near the back. The braces go across the box from left to right and the monitor lays on them. The braces are knotched so the monitor will be held in the middle (left to right).
There's a 2 inch gap between the monitor and the side of the cabinet on both sides.
Now that the screen braces are done, I attached the bottom and prepped for painting by filling all the screw holes with wood filler. I let that dry overnight and then sanded the entire thing smooth.
Time for...
Painting
I started by painting the entire cabinet black. Then, I tipped it on its side and did a spacescape on one side.
I let that dry overnight and then did another on the other side:
If you're curious about the paint job, I just watched a few videos on YouTube about spray can space art and gave it a try. It wasn't too hard and I think it came out well.
Once that was dry, I sprayed clear coat over the entire box. Two full coats and then extra around the buttons where your hands touch. Once that's dry, on go the legs.
I created a jigjig: a device that holds a piece of work and guides the tools operating on it out of the scrap 4x4 I got. (See details here.) This is to help me drill the holes for attaching the pinball legs.
I am cannibalizing the old pinball machine for the new one. This is to save money on parts. I transferred the legs from the old cabinet to the new one.
I used to love my first pinball cabinet, but seeing them side-by-side, I think you can see why I wanted to upgrade my pinball experience.
Next up, build the backbox. I have the lumber ready to go. I just need to screw it all together.
I'm using the same 27" monitor and speakers from the old build. I'm also adding a third, small screen for the DMDDMD: Dot Matrix Display.
Here's the inside of the backglass portion:
When I cut out the side pieces of the main cabinet, there were some angled pieces of wood left over. That's what I'm using for the left and right sides of the back box. I'm using the 8" shelving for the bottom and the 10" shelving for the top.
Inside, I built tracks to hold the speakers and backglass monitor.
I cut a hole in the base to allow cables and air flow between the main cabinet and backglass portion. The backglass box is attached to the main cabinet with two large eye bolts (one on each side of the access hole).
The backglass on a real pinball machine is just about square. If you compare the backglass from my old machine to the new one, I think you'll see that the new design looks much better, more realistic:
The old machine's backglass portion was much more squat. I think this build is really turning out nice.
I put wood filler on all the screw holes and seams:
Friendly reminder, be sure to always wear a mask when sanding or painting. I'm sure you don't want to paint the inside of your lungs black!
I started with just a light coat of black to start. Then, I painted a starfield and some moons to match the main cabinet:
Now, it's time to start on the guts...
Wiring
My old PC (NUC) strained to run PinballX, so I wanted to upgrade everything there as well. As luck would have it, my daughter was in the process of upgrading her PC and gave me her old video card (an MSI GeForce RTX 2070 Super). And, a friend of mine gave me an old motherboard and i7 CPU.
I just needed to buy a "bench case", power supply, and SSD. I got a Crucial P310 500GB SSD for $62. This is for OS, VPX, tables, ROMs, PinballY front end, and attract videos... and I will never fill it up. Not even close.
Here's how it looks on the inside of the cabinet:
To hold the PC in place, I just ran some screws through the bench case to the wood bottom.
Now that the paint is dry, I assembled the backglass portion and mounted it to the main case. I also transferred the fan finger guards from the old case for speaker protectors:
I'm using the old 27" backglass monitor from the old build and I purchased a wisecoco 7.84 Inch Mini Monitor HD IPS 1280x400 for the DMD secondary screen. It was only $45!
Gamers usually use this type of screen inside their transparent cases to display temperature and fan speed information. I'm using it as a DMD!
I took all the wiring out of the old cabinet without even taking everything apart.
Then, I transplanted it into the new cabinet directly. Everything worked fine. I just needed to connect up (solder) the two new "coin in" buttons and the menu button.
I attached those buttons and lamps. Everything's working now!
I ordered a piece of glass for the new cabinet. Seven years ago, during my original build, I paid $47, today... $85. Ouch!
While waiting for the glass to arrive, I installed the new side rails:
This is when I used the T-molding slot cutter. The side rails install like T-molding. They have a plastic insert that slips into the slot and keeps the glass secure.
BTW, I used the Pinscape Build Guide when assembling my cabinet--lots of good info in there!
As the physical build is pretty much done, I moved the machine into the game room to start the software install...
Software Install
I started with a Windows 10 home install. Once I had that working and fully updated, I disconnected from the Internet and disabled the virus scanner. My pinball machine lives OFF grid, so no need for the virus scanner slow down.
Most people but all three screens in a row (playfield, backglass, followed by DMD) but I like the DMD below the backglass.
Once I had PinballX installed, I started transferring all the tables from my old PC to the new one. Since the playfields are different sizes between the two cabinets, I have to tweak each table to look good at 21:9.
Debug
I ran into some trouble when configuring all the software. Here's what I found and how to fix it:
1) Whenever I enter the VPX interactive settings mode, I get the following error message:
Solution: In PinballX, menu Preferences / Video settings, enter the physical size of your display.
2) This is a digital system, yet, every table seems to lean to the right:
Solution: In VPX, I did not have the view drop-down box set to "Cabinet". This fixed it:
Final touches
The glass finally came in! While I was waiting on that, I created a "frame" around the playfield monitor to cover up the gap between the screen and cabinet:
In case you're curious about what's behind the coin door:
I have access to the volume control and a USB extension cord so I can transfer tables to the PC.
And, with that...
The build is done!
I still have to tweak the rest of the 50+ tables I have installed, install the PinballY front end, and capture all the front end attract videos.
In the mean time, I'm having a ton of fun playing pinball again!
EDIT 5/11/2016: One last tweak to the pinball machine
Wow, I can't believe you've read this far!
How can I help?
If you've enjoyed my story, how about buying me a cup of coffee?
This site uses PayPal to process your donation. You don't need a PayPal account, just a credit/debit card will do.
If PayPal doesn't work for you, no need to worry--just enjoy my pictures for free!
Thank you for your donation. I don't get many, so you can be sure I really appreciate yours!
News
Sudoku 1.2 Released (April 19, 2026)
Solve sudoku puzzles for fun! Over 280 puzzles at all levels included. More...
CodeLab 6.13 Released (November 17, 2024)
This latest release of CodeLab for Paint.NET includes the
ability to write GPU accelerated plugins. More...
Double-Six Dominoes 3.1 (May 10, 2021)
This long-awaited refresh of the most popular dominoes game
on Download.com is now available! More...