Now that the entire cabinet is built, it is time to start wiring up everything.
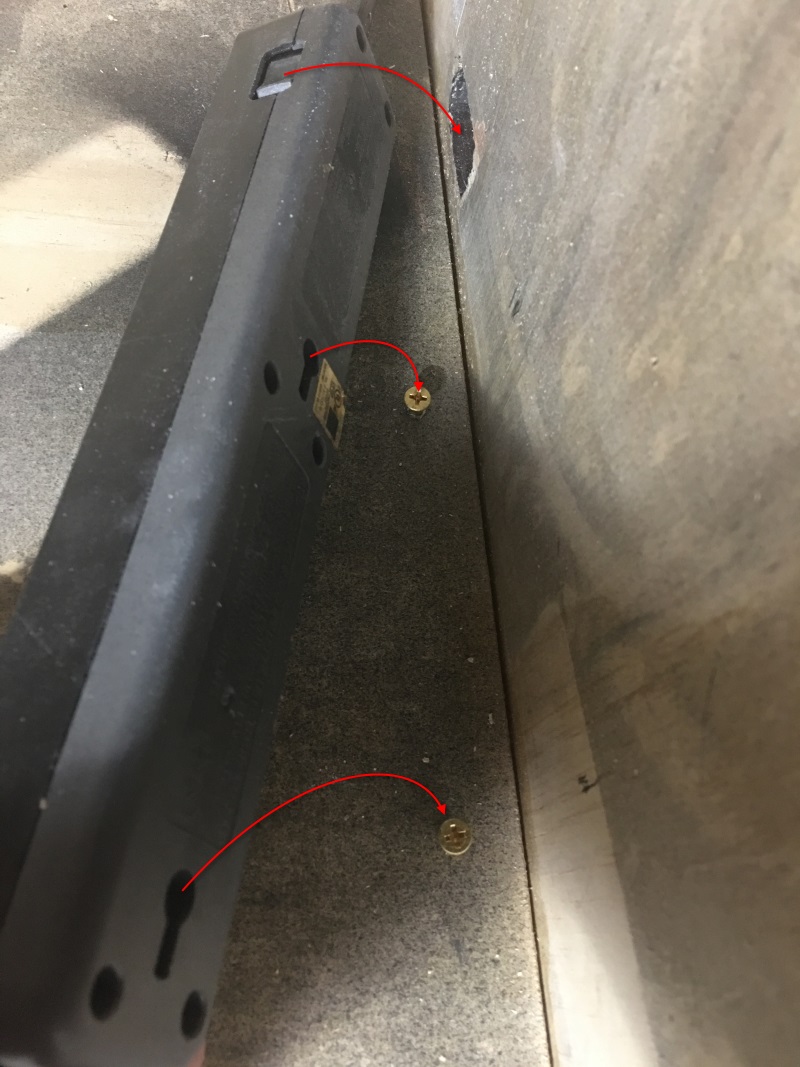
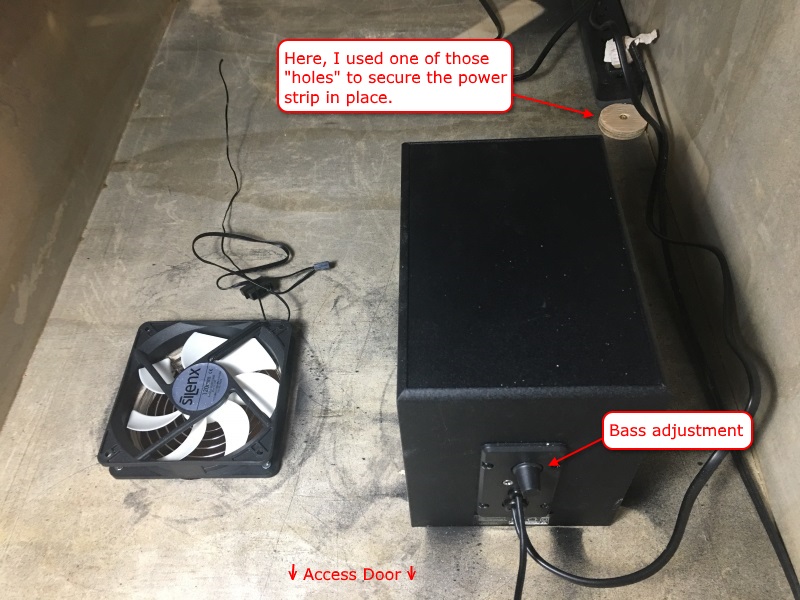
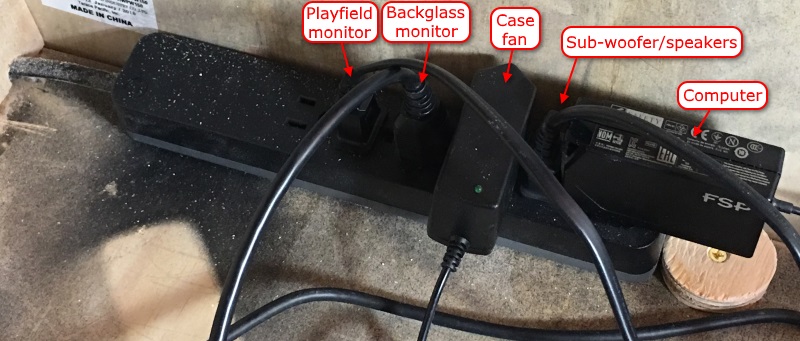
I had several power strips around the house, but none had a switch on the side instead of on the top. I actually found one at WalMart, a GE Pro Surge Protector, 6 outlets with an 8 ft. cord. The first thing I did today was secure the power strip inside the cabinet with 2 screws. I placed it right along side the edge.
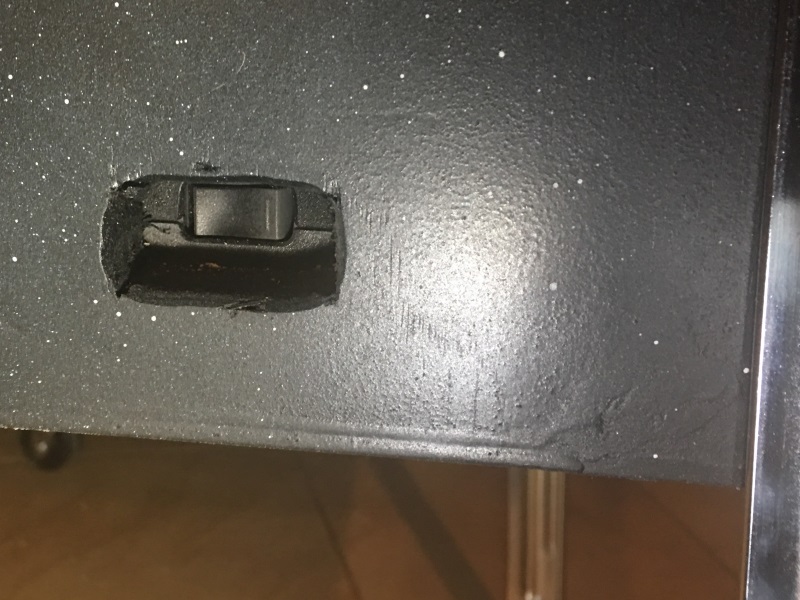
Earlier, when assembling the case, I had cut a hole in the side of the case for the power switch access.
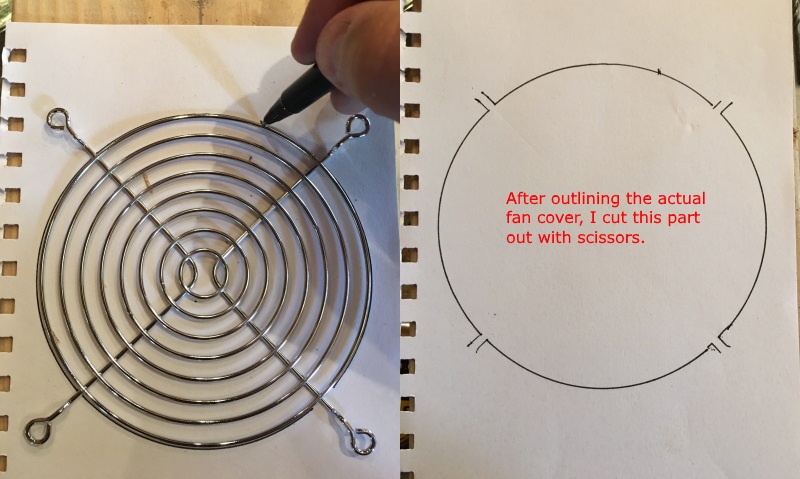
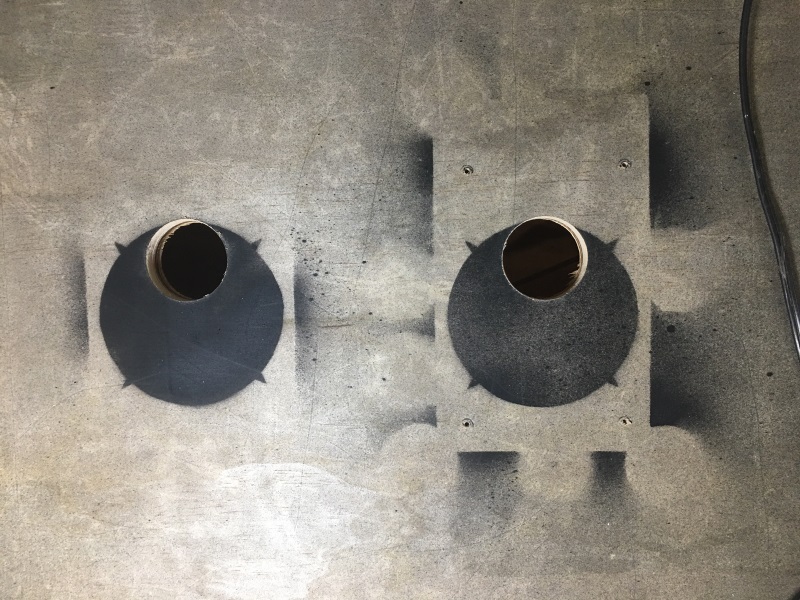
Next, I needed to cut 2 large holes in the floor of the cabinet--one for the subwoofer and one for the case fan. I created a template out of paper by cutting out a hole for the fan cover and poking holes in the paper where the screws would go.
I placed this template inside the cabinet and sprayed a quick shot of paint on it. Once that dried, I drilled 2 large holes with a hole saw.
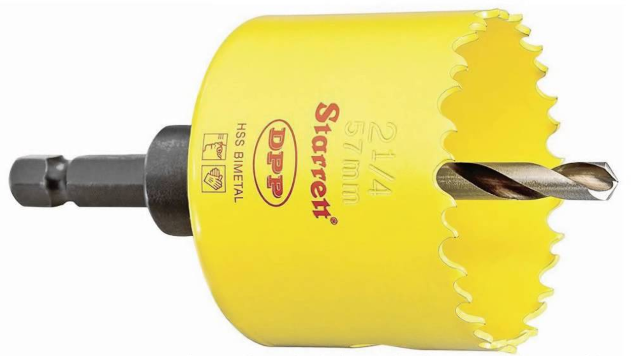
A hole saw is a round saw that works with your drill to make large round holes. Here is a picture of one:
Note: Every time I drilled a large hole, I set aside the round left over piece. I have several of them now.
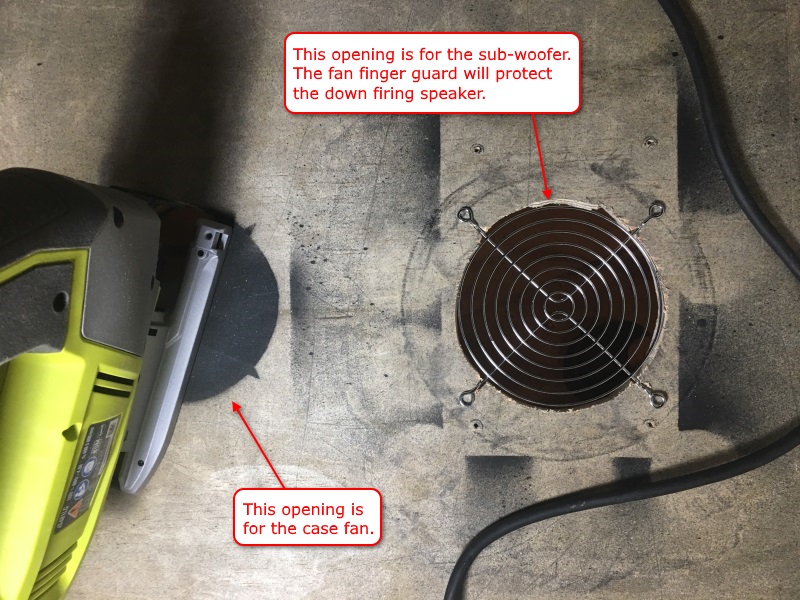
Using the jig saw, I finished cutting out the large holes. Before cutting out the second hole, I made sure the fan cover would fit. I'm going to use two 120mm chrome fan grill finger guards--one to protect the fan and one to protect the subwoofer speaker.
Here you can see the 120mm case fan and subwoofer mounted in place. I removed the feet from the subwoofer and screwed it into the cabinet from below. I guess I could have decased the subwoofer, but this was easier and no one's going to see it anyway. The case fan requires 12v, so I purchased a 12v power adapter. I had to cut off the ends of both, strip the wires, twist them together, and secure them with electrical tape.
After taking this picture, I mounted an additional fan guard to the top of the fan... just in case a wire falls on the fan, or I accidentally touch it with my fingers.
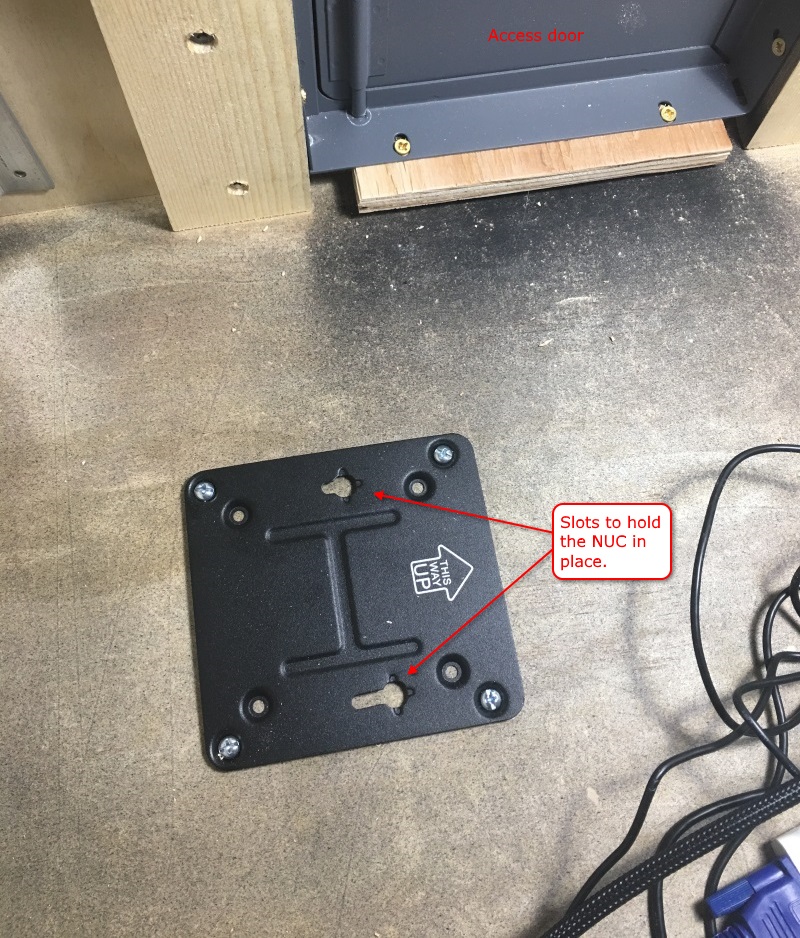
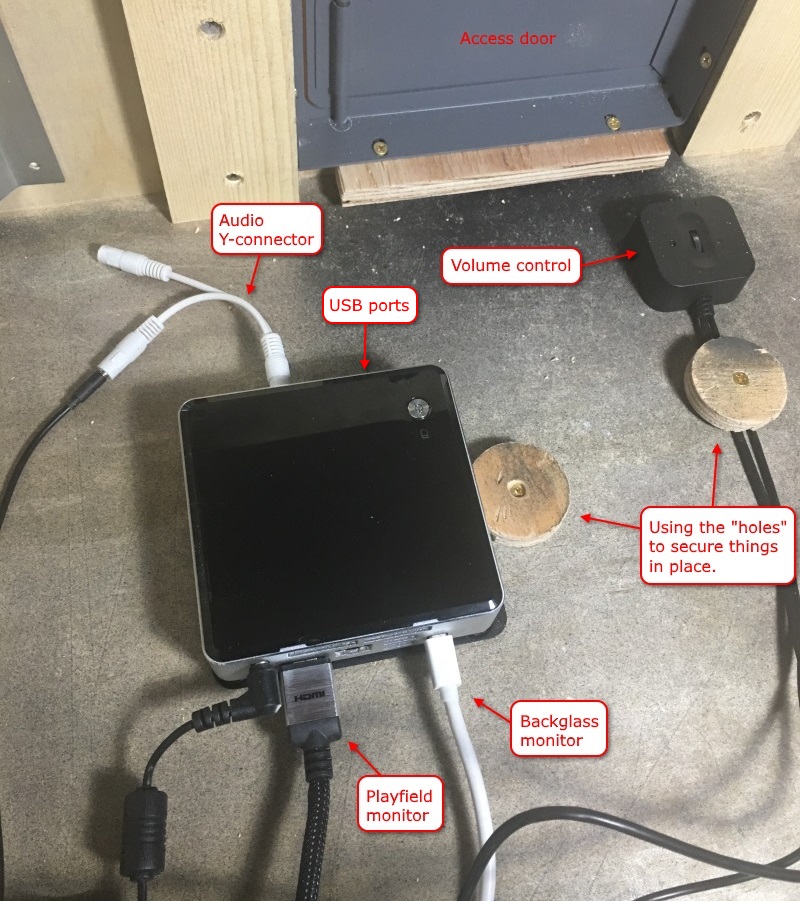
Now it is time to mount my computer. The Intel NUC comes with a bracket so that you can mount it to a wall. I decided to mount it to the bottom of the cabinet up near the access door. This way, I have access to the power button (should I need it) and to the USB ports. Four screws mounted the bracket to the cabinet.
There are 2 screws on the bottom of the NUC that connect to the bracket. Then, I placed a small block of wood so that the NUC won't get knocked off the bracket. I also mounted the speaker's volume control up near the access door. The speakers/subwoofer connect to the NUC using a y-adapter. This is because the NUC has a single 4 position plug for both audio out and microphone. But, the speakers/subwoofer has a standard 3 position plug.
Everything's plugged in and I still have one spot left. Man, I'm not sure where all the sawdust is coming from. I keep vacuuming it up and it keeps appearing!
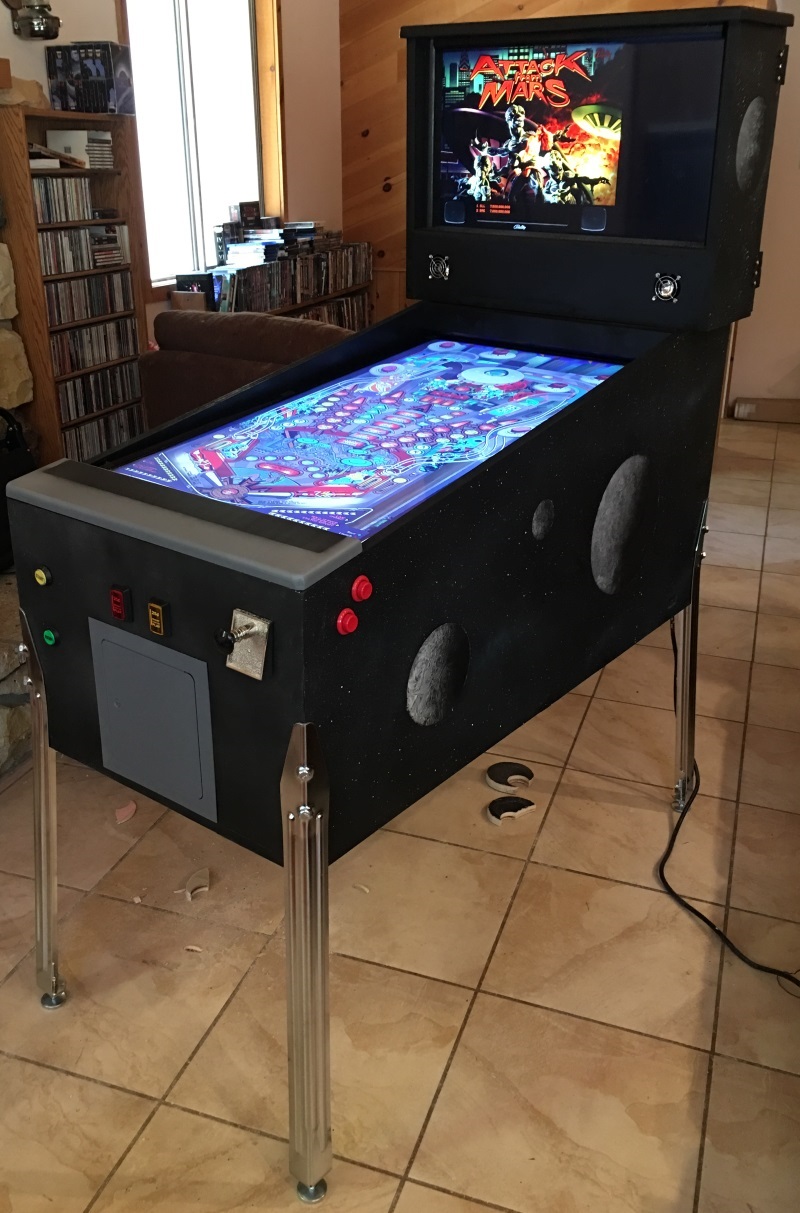
Time for the first "smoke test"...
Yup, everything is still working... and no smoke! I did feel some air coming out of the back vents, so the fan is working well. Hmmm... looks like I need to clean up the floor before someone sees that!
Tomorrow it is time to tackle the plunger controller and buttons.
News
Sudoku 1.2 Released (April 19, 2026)
Solve sudoku puzzles for fun! Over 280 puzzles at all levels included. More...
CodeLab 6.13 Released (November 17, 2024)
This latest release of CodeLab for Paint.NET includes the
ability to write GPU accelerated plugins. More...
Double-Six Dominoes 3.1 (May 10, 2021)
This long-awaited refresh of the most popular dominoes game
on Download.com is now available! More...